Enable Security
To secure your Visual KPI websites, data, and the Visual KPI Designer, you first need to enable security. Visual KPI supports any security model that uses IIS, such as VPN, RSA, and other two-factor authentication methods.
Integrating the Visual KPI Server Manager with IIS saves you the time of setting up website authentication.
To enable security, follow the steps below to use IIS and the Visual KPI Server Manager:
- Step 1: Decouple parent inheritance in IIS
- Step 2: Enable security in IIS Manager
- Step 3: Determine who gets access to websites
- Step 4: Set up rights assignment
Step 1: Decouple parent inheritance in IIS
To set security for each component of Virtual KPI separately, you need to decouple directory inheritance from the Visual KPI website parent directory so that the Interface and WebService (for the Visual KPI Designer) won't inherit the same security as the Visual KPI website.
Use IIS Manager to decouple inheritance from the parent directory. You'll need to do this for each component. The components are:
- Visual KPI Server instance (website)
- Interfaces (data sources)
- WebService (Designer)
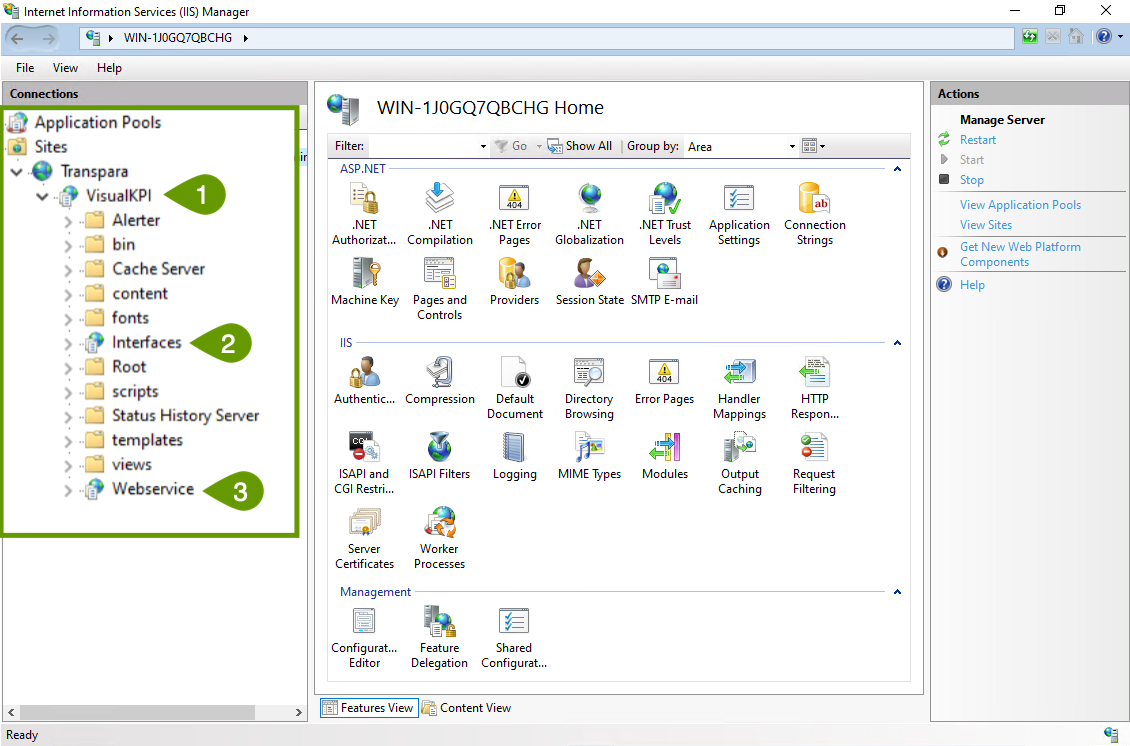
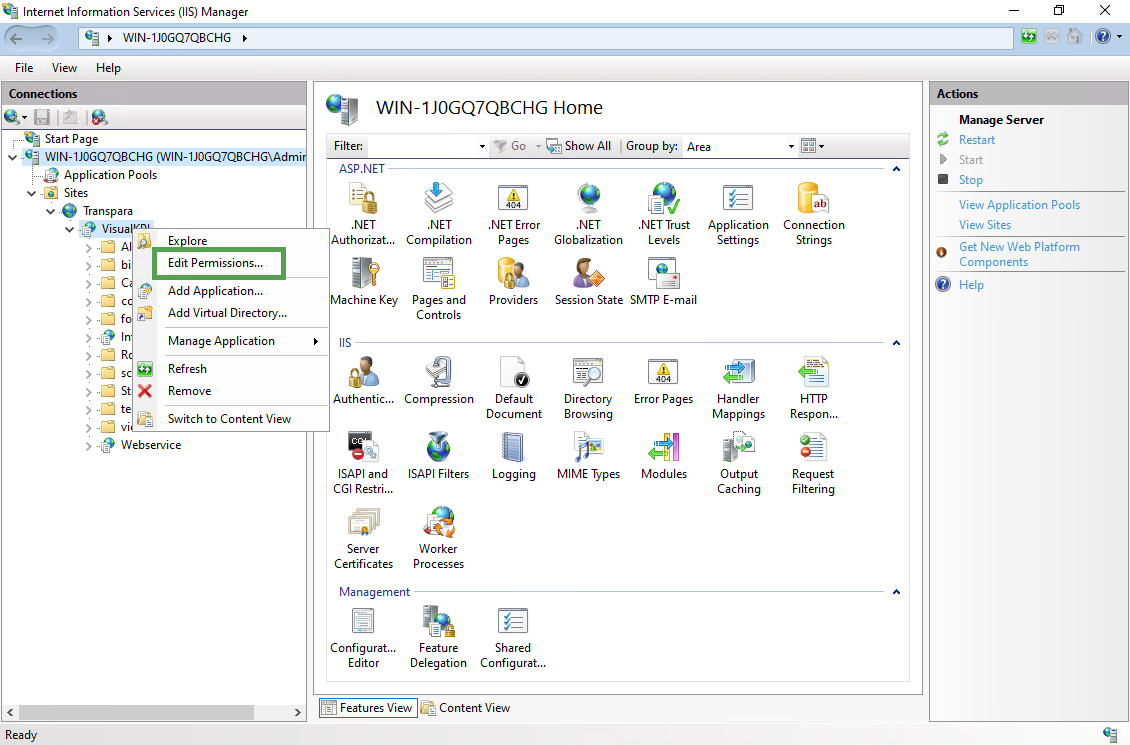
At the parent level of each component:
- Right-click and select Edit Permissions.
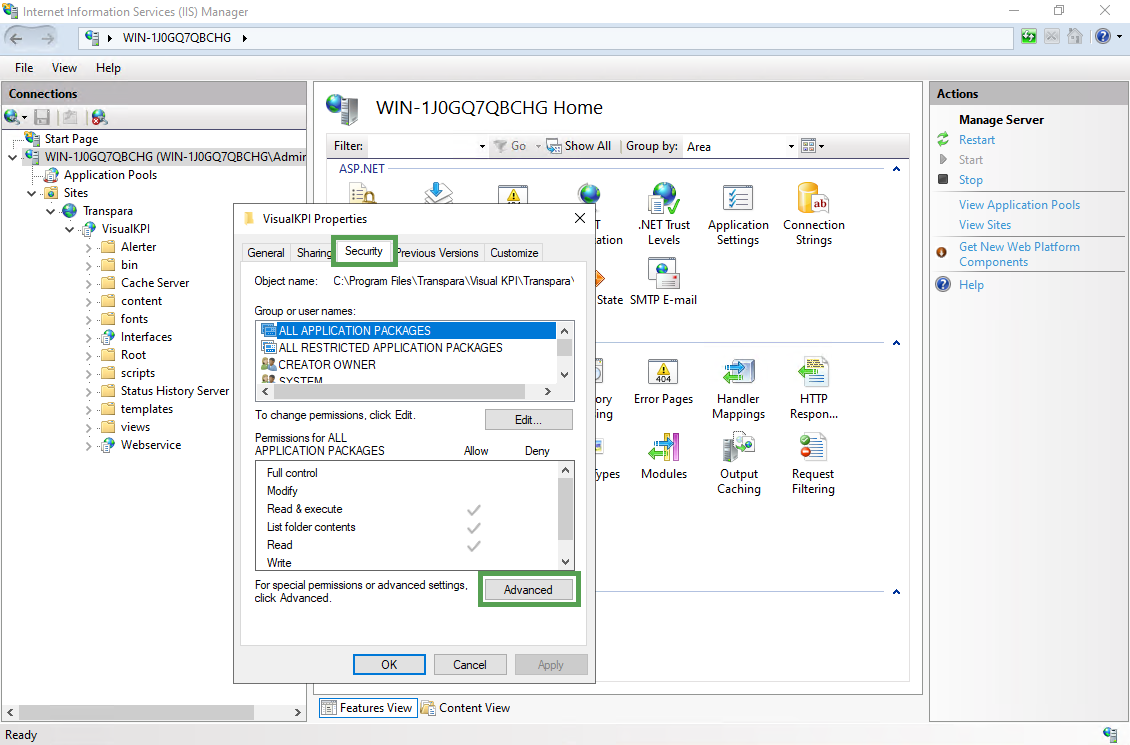
- When the Properties panel opens, select the Security tab.
- Click Advanced.
- In Advanced Security Settings, on the Permissions tab, click Disable inheritance.
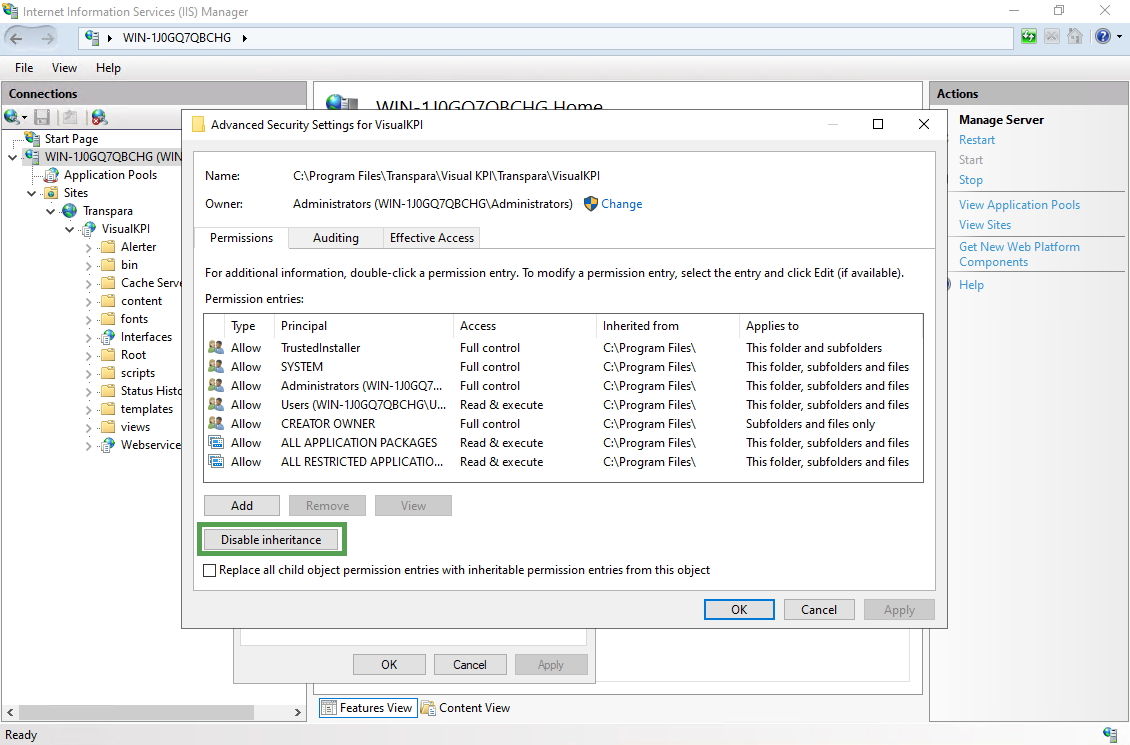
The UI may be different for other versions of Microsoft Windows Server.
- In the Block Inheritance panel, select Convert inherited permission into explicit permissions on this object.
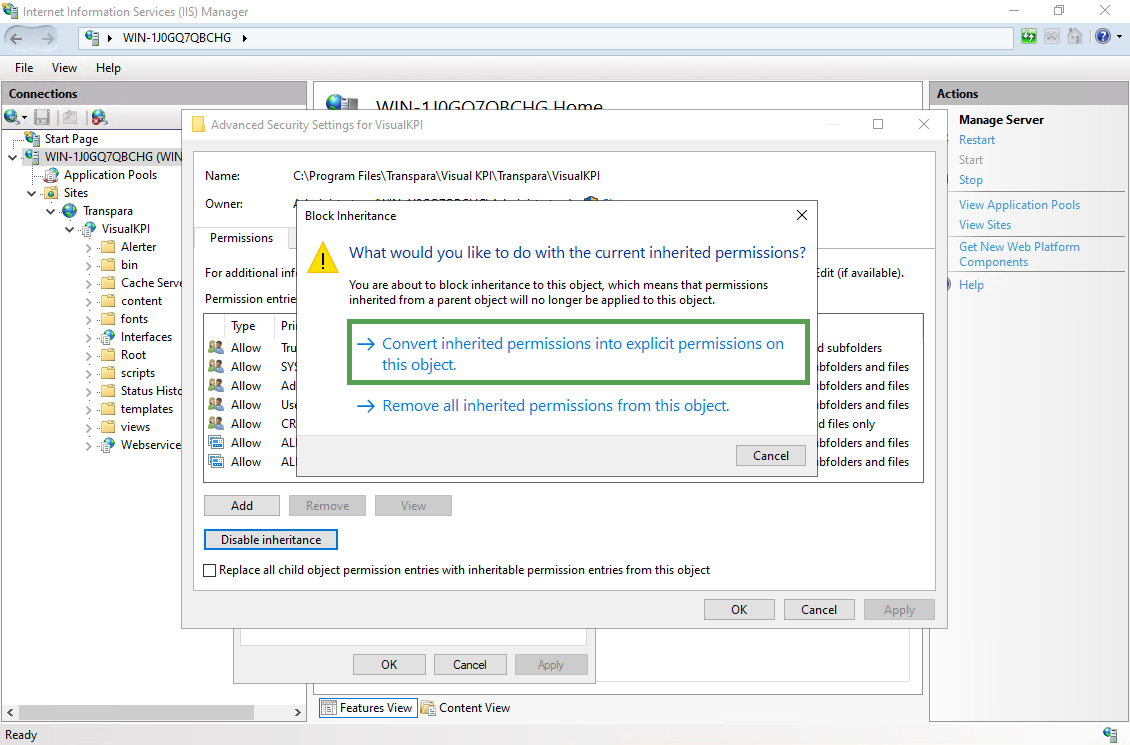
- Click OK.
After you finish, remeber to repeat this for each component.
Step 2: Enable security in IIS Manager
For every Visual KPI website, use IIS Manager to turn off anonymous access on the Visual KPI website and WebServices (hosts Visual KPI Designer).
Before you set up security for Visual KPI Sites, Interfaces and the Visual KPI Designer, you must enable security in Microsoft Internet Information Services (or IIS Manager for Windows). You'll need to do this for each virtual directory to which you want to edit permissions.
The most common security settings are for the Visual KPI website and Visual KPI Designer. Most users will only grant access to the Visual KPI Designer software to those who can access it, but you can also set up access through IIS. Most clients do not set security for Interfaces, but you can do it by following the steps outlined below.
Before you start this process, you should complete Step 1: Decouple parent inheritance in IIS.
Setting Open or Secure access
You can either allow open access to each server or set security, which requires users to authenticate with a username and password.
For open access:
- In IIS Manager, click the virtual directory for which you want to set authentication.
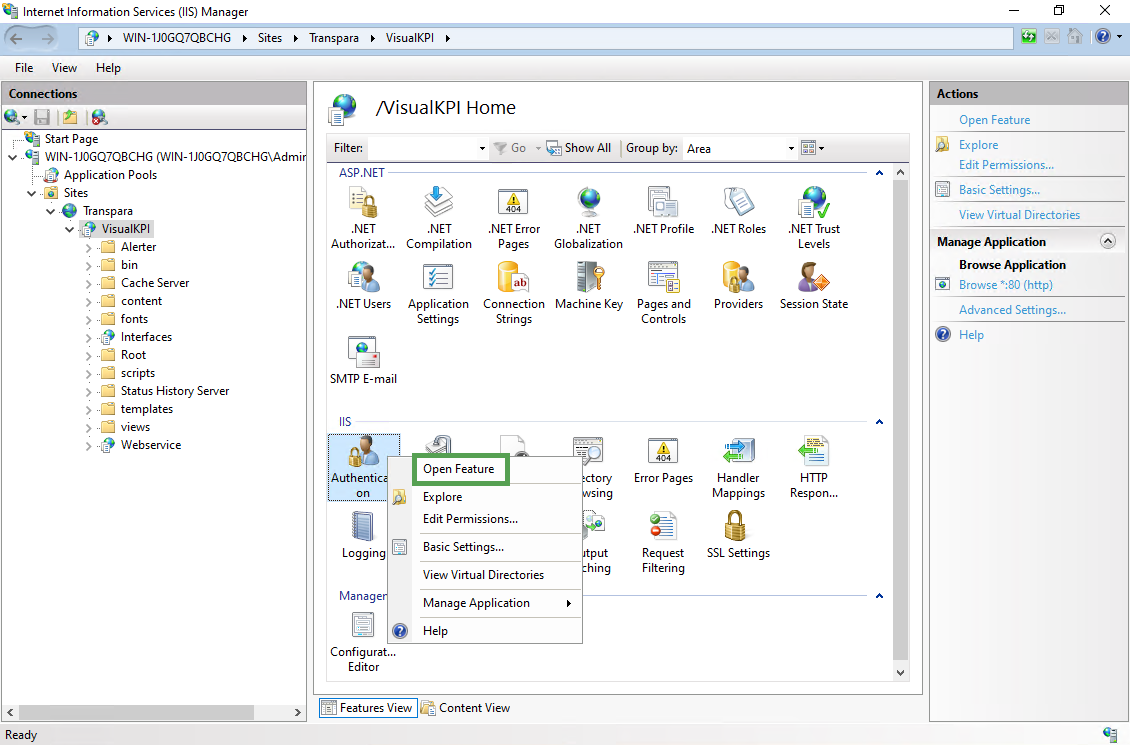
- Right-click Authentication in the Home panel and select Open Feature to open the Authentication panel.
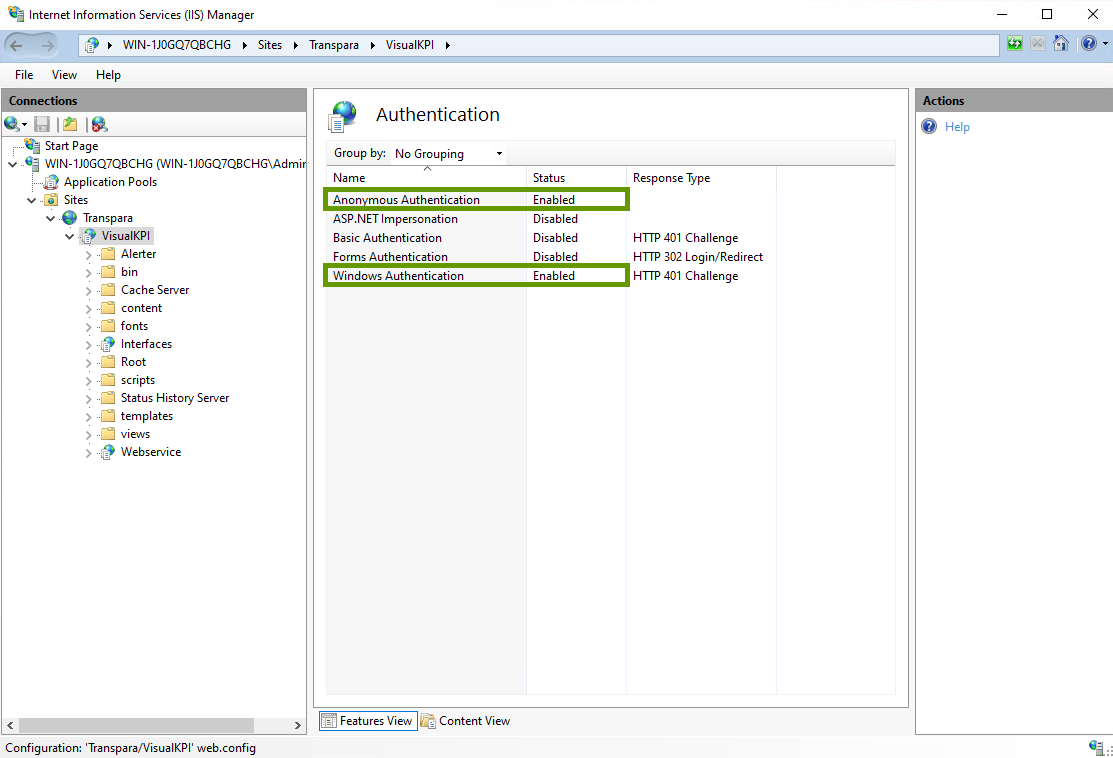
- Enable Anonymous Authentication.
- Enable Windows Authentication.
To set secure access:
- In IIS Manager, click the virtual directory for which you want to set authentication.
- Right-click Authentication in the Home panel and select Open Feature to open the Authentication panel.

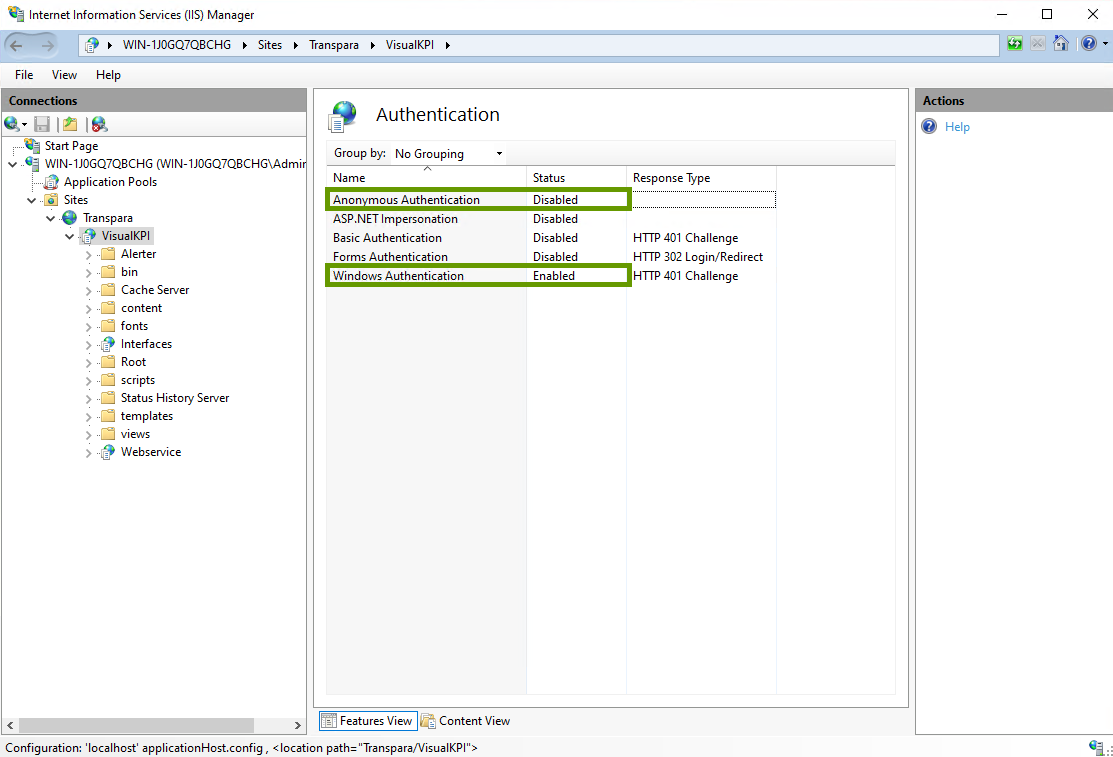
- Disable Anonymous Authentication.
- Enable Windows Authentication.
Step 3: Determine who gets access to websites
Once you set security in IIS, you must determine who gets access. For example, you can set authentication for the entire website. This sets up who can get access, not who gets to see what.
Visual KPI Server Manager allows you to create local groups and users, making it easy to set up authentication in IIS.
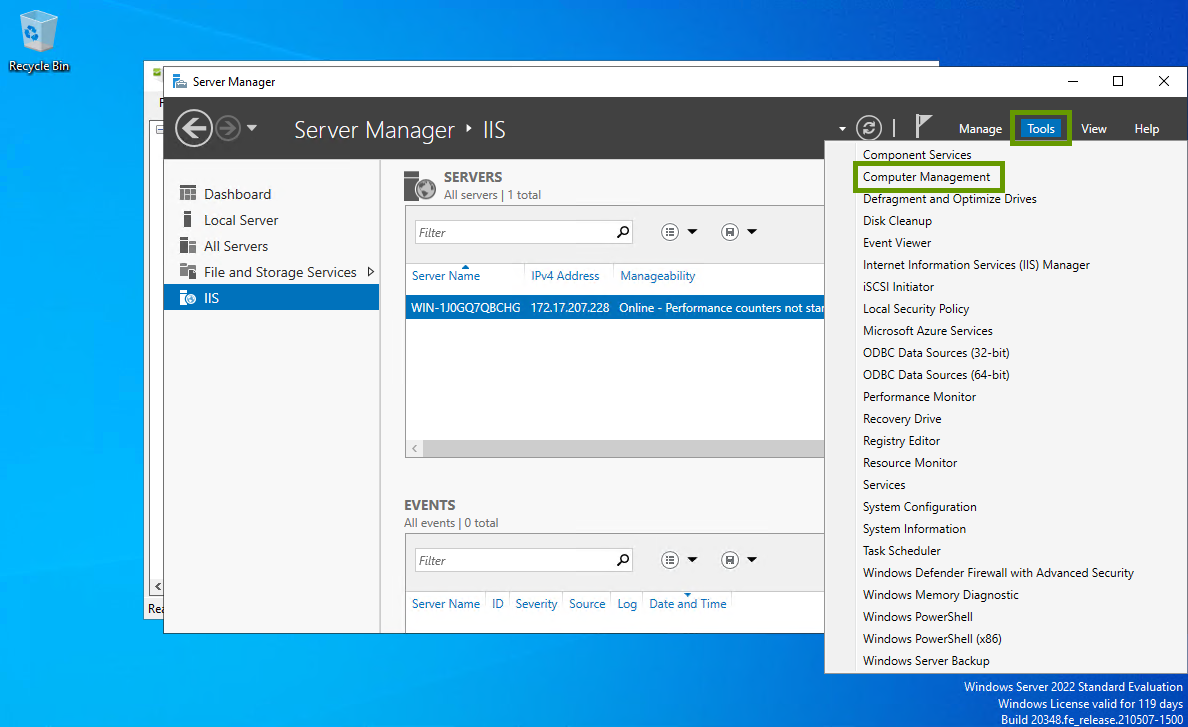
- Open the Windows Server Manager.
- Click Tools and select Computer Management.
- Under Local Users and Groups, you can have a separate folder for Users and Groups.
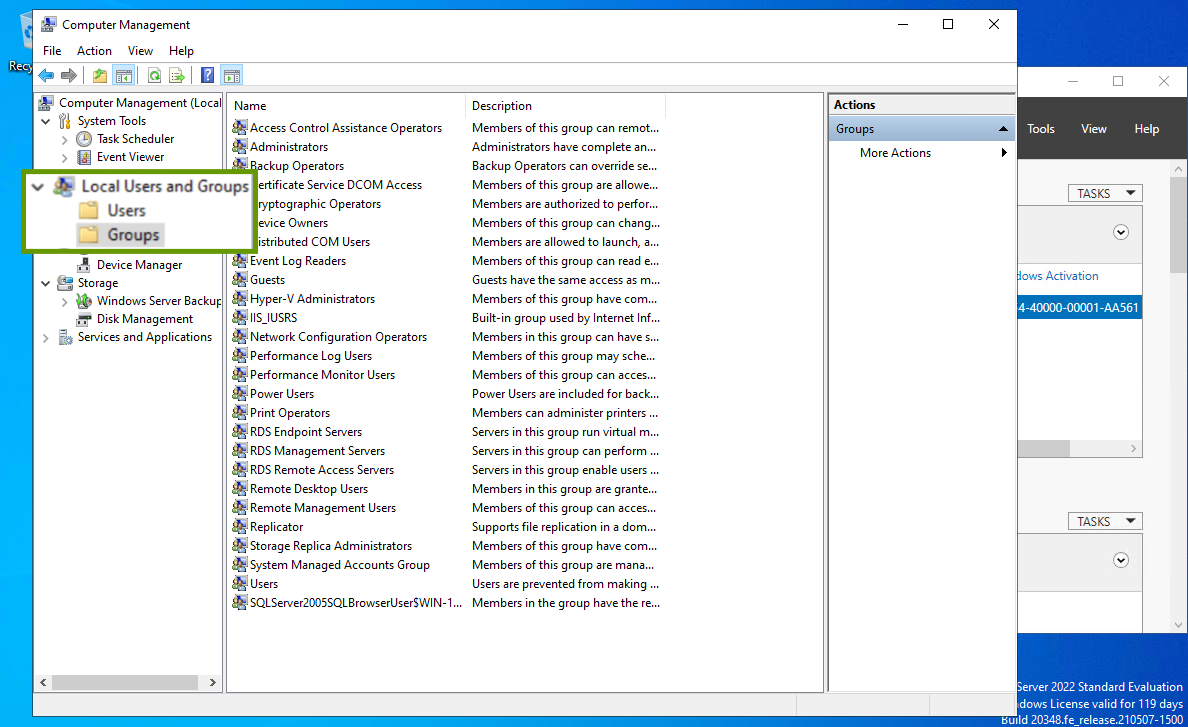
- Move users into groups, or create a new group.
Create a New Group
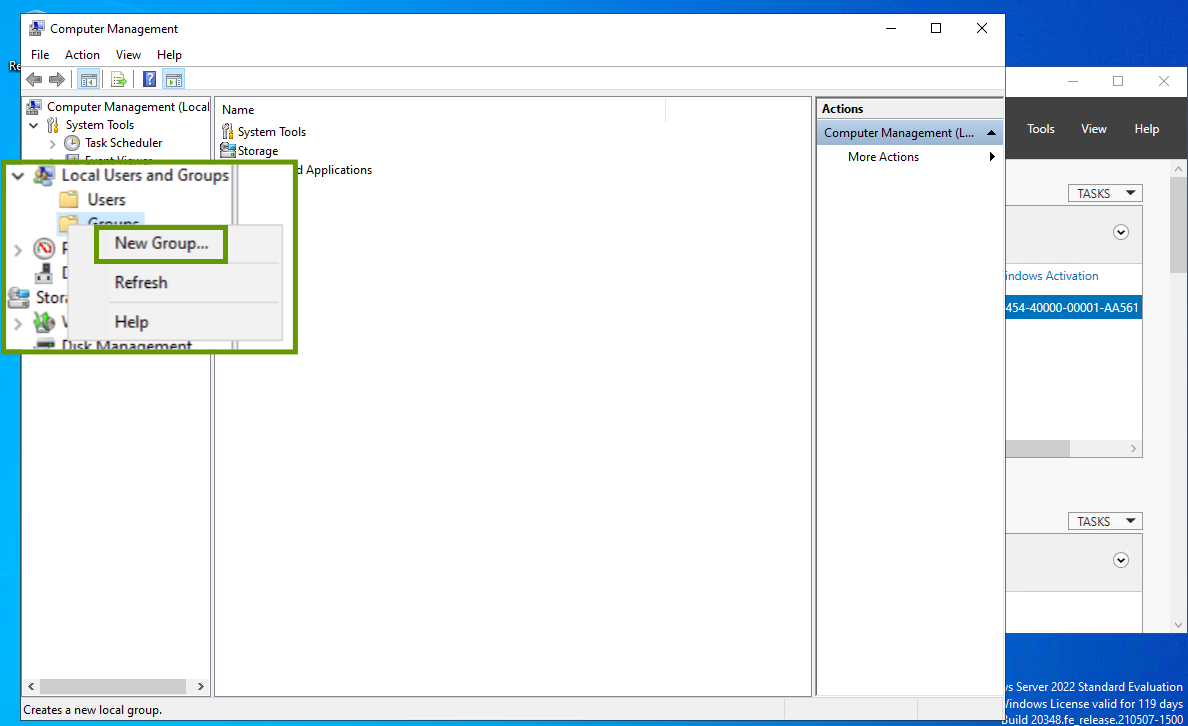
- Right-click in the Groups panel.
- Click New Group.
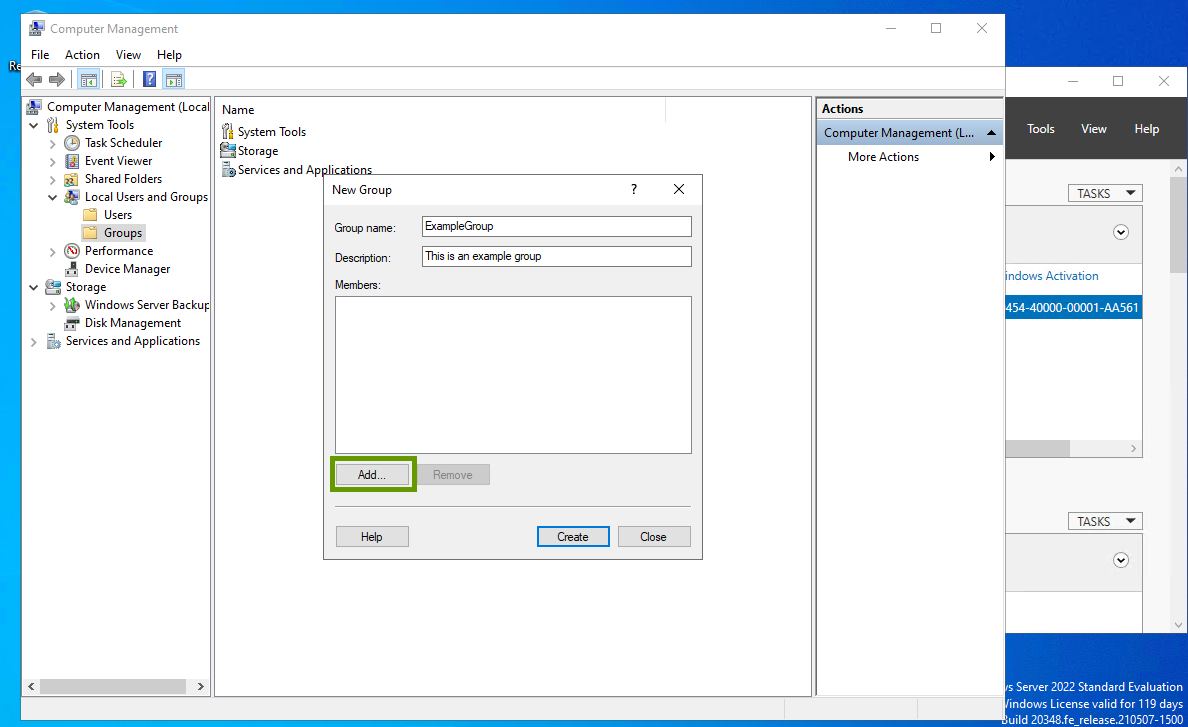
- Name the Group.
- Click Add to add members to the Group.
- Start typing a name and click Check Name to find and add users.
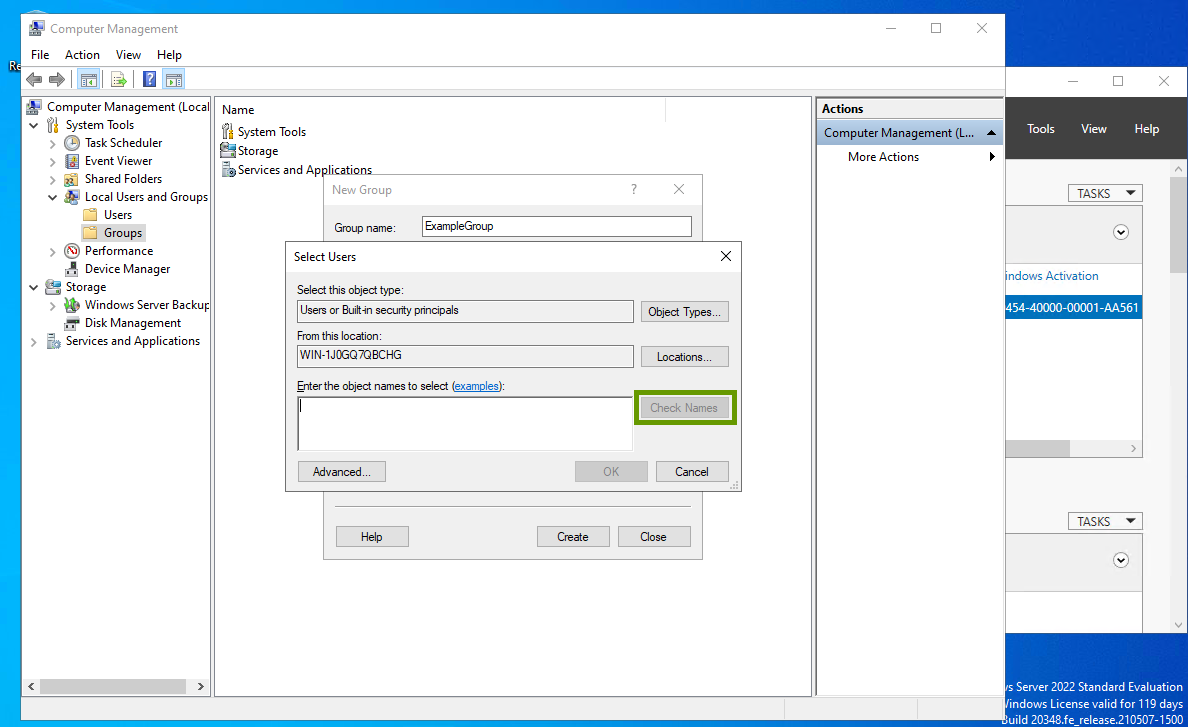
- Click Create to create the Group after you added all the users.
Add Groups in IIS Manager
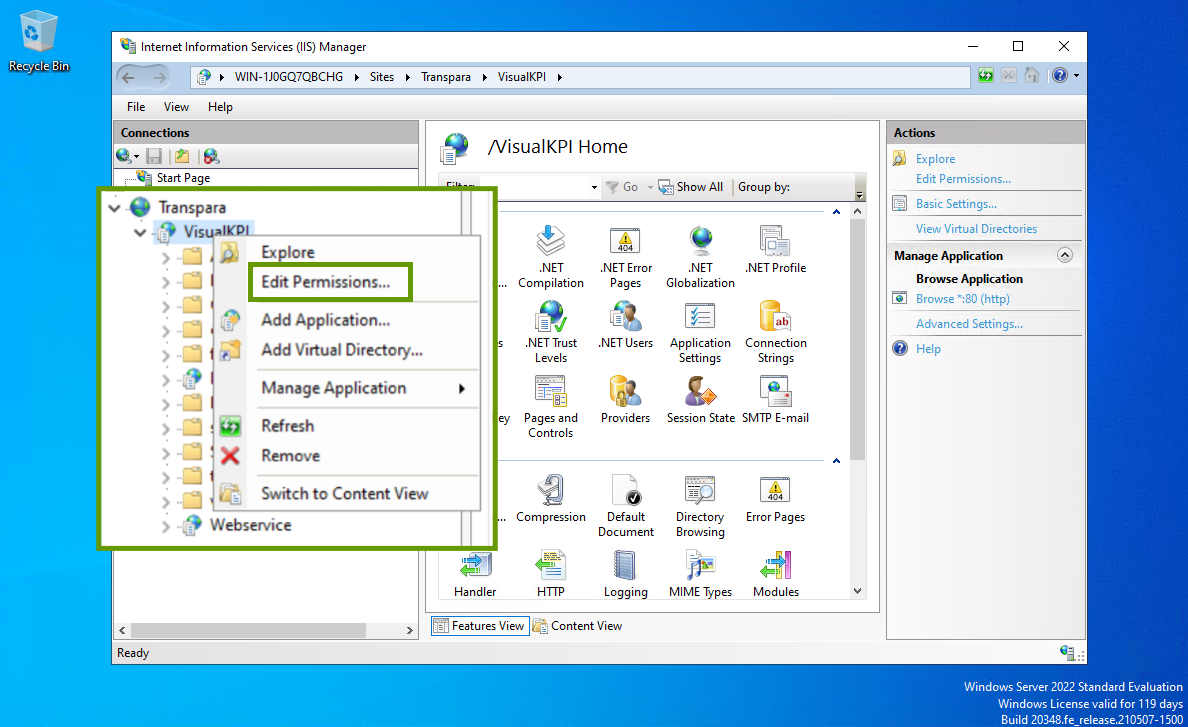
- In IIS Manager, right-click the top level for the website and select Edit Permissions.
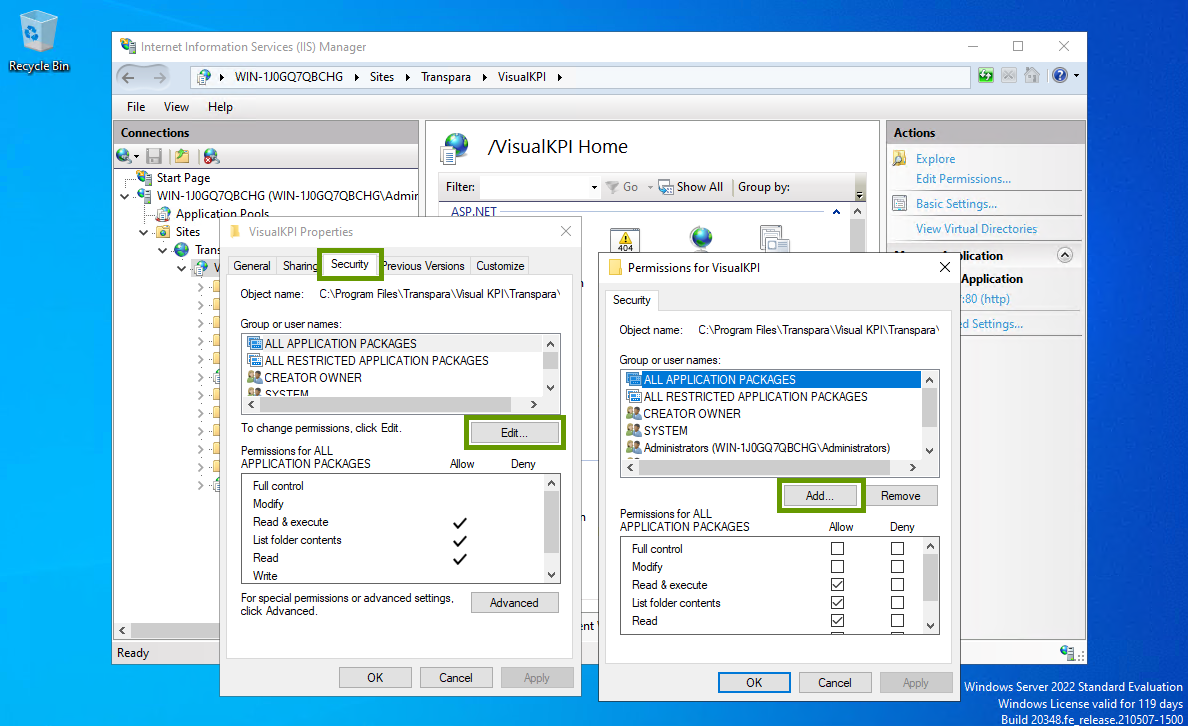
- In the Security tab, click Edit... and then, in the Permissions panel, click Add... to add the new group.
- In the Permissions Entry panel, click Locations and select the server where the group is located.
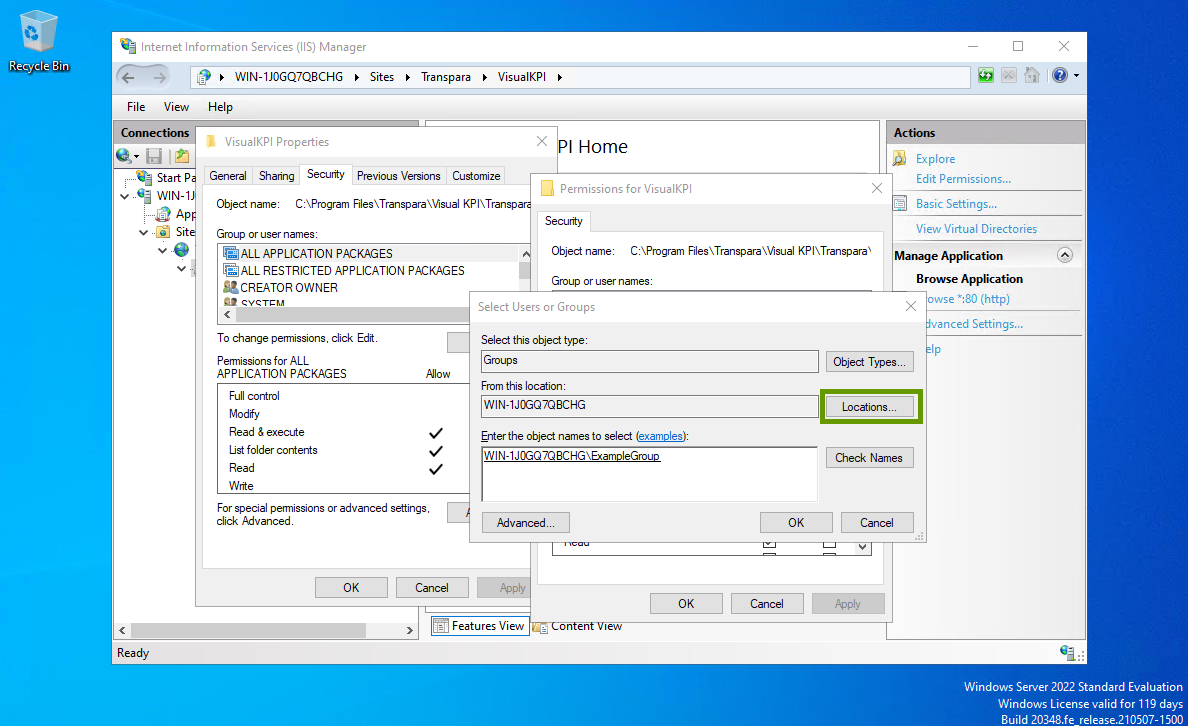
- Type the name of the group and click OK.
- With the new group selected, set the permissions as allowed for the new group as presented below:
- Read & Execute
- List folder contents
- Read
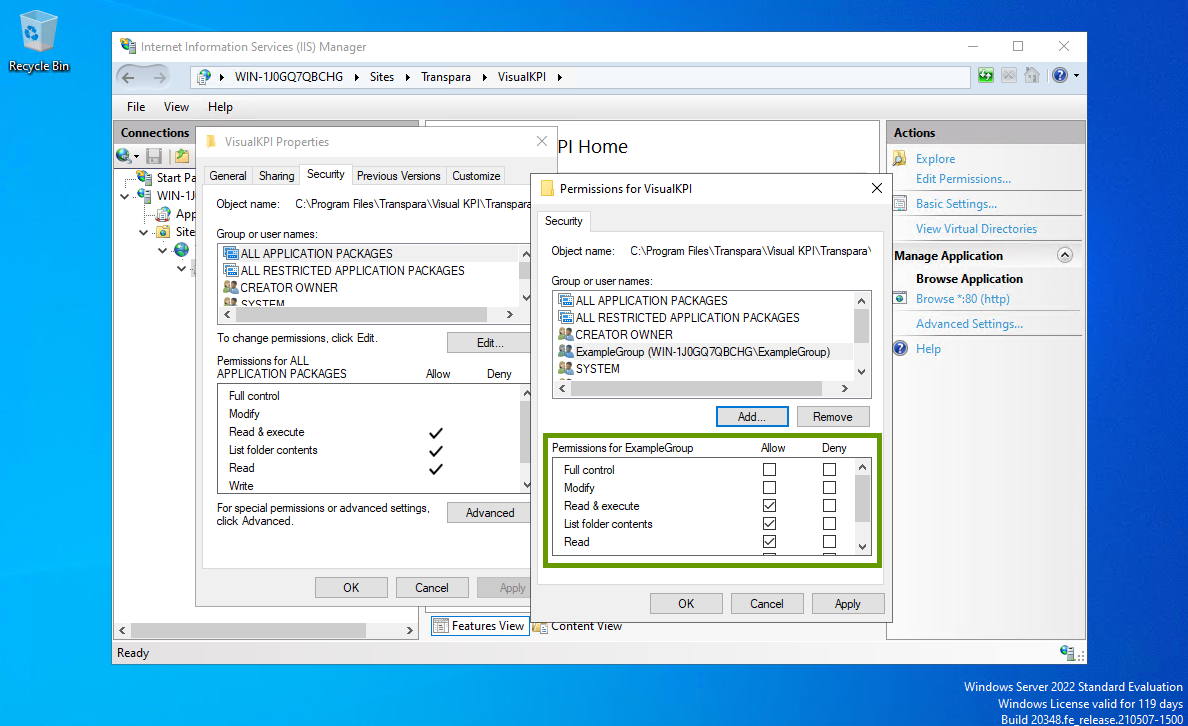
- Click OK to save.
Step 4: Set up rights assignment
Once users get access to the website, what can they see? This is where you'll set up rights assignment or object-level inheritance for users or user groups in the Visual KPI Designer. This final step must be completed in Visual KPI Designer. To learn more about it, go to the Object-level Security guide.
Access Denial Messages
Users without access to Visual KPI sites or virtual directories will see the following messages:
- Visual KPI sites: a simple 403 error page.
- Visual KPI Designer: a modal dialog box telling the user they are forbidden to access the necessary Web services.