Configuration
To set up an interface in Visual KPI Server Manager, you will need to know the prerequisites, how to install a new interface in your system, and how to verify interface connections. You can find this information on this page.
Prerequisites
Before connecting interfaces to Visual KPI, make sure you meet the following prerequisites:
- Have Visual KPI Server and Server Manager installed.
- Have the data source client tools installed on the Visual KPI Server. For example, SQL Server Management Studio, proper Oracle drivers (and a client to test them, such as Toad), PI SDK for OSIsoft, etc.
- Have the necessary rights and knowledge to access the database, test the connection, and query the desired data.
Having the client tools mentioned above is important for testing the interfaces.
Steps for Installing Visual KPI Interfaces
Regardless of the data source, the process of setting up a Visual KPI interface involves these standard procedures:
- Make sure to install the native client tools of the data source on the Visual KPI Server. You can find links to the vendor drivers and other necessary software in Prerequisites and Downloads.
- Using Visual KPI Server Manager, install the interface.
- In Visual KPI Server Manager, select the site you desire to install a new interface.
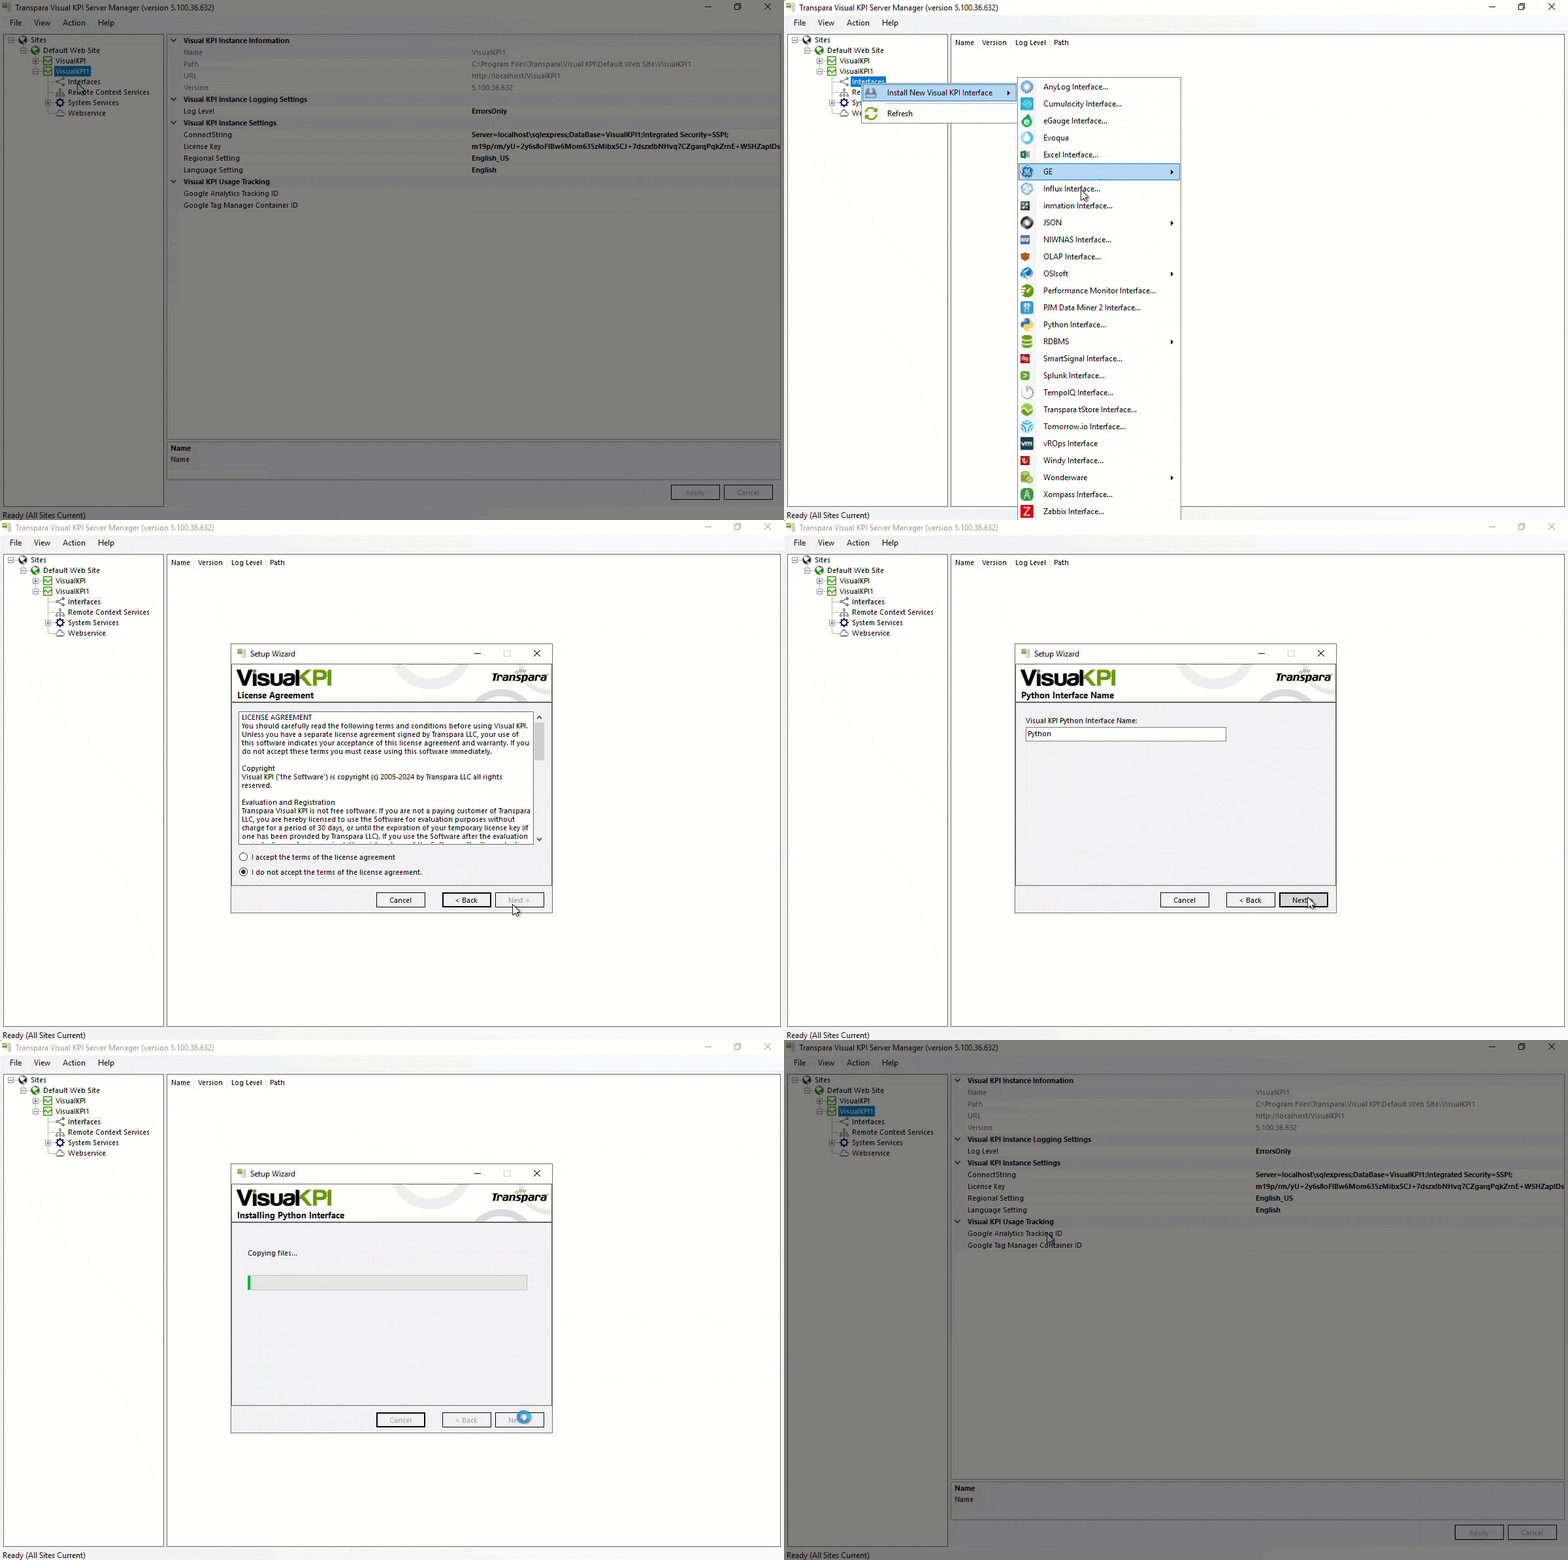
- Right-click in the Interfaces tab, and select the Install New Visual KPI Interface option.
- Select the interface you want to install from all available interfaces presented.
- An install wizard will open.
- Follow the installation process, adding the necessary information as requested.
For Interfaces that need further configurations, refer to the Working with Interfaces page.
- Verify the connection.
- Test the connection.
- Use Visual KPI Designer to define an interface for a KPI.
Below, you will find a visual guide to these steps:

After these steps, you will have your new interface ready. Most interfaces in Visual KPI are pre-packaged interfaces that include all components and are configured along the installation wizard without the need for queries.
Verifying an Interface Connection
After installing and configuring the interface, use Visual KPI Server Manager to verify the interface's database connection.
Click Verify Connection after right-clicking the interface. A message appears indicating success or failure.
If there were any errors, make the required changes to the Connect String and/or Queries and repeat the verification.
Testing an Interface Connection
You can use Visual KPI Server Manager to test the interface connection and access the database. To test it, follow the steps below:
- Right-click the ODBC interface and select Browse. Your browser will open and display the Interface's Web Service page. The image below is an example of how this page looks:

-
Click any of the Test links displayed on the Web Service page.
-
In the LookupValue field, enter a valid lookup name and click the Invoke button, as exemplified bellow.

- A new instance of your browser will open, with content similar to the following image:

Search for the test results within the <NewDataSet xmlns=””> entry. The results of the test are within this entry. If the connection and security settings are valid, a value is returned.
If there are any errors, make the required changes to the Connect String and/or Queries and repeat the test.