Basic Setup
When you start, visual KPI Designer is already set up with basic configuration. Setting your site's branding and finishing details takes only a few minutes. In addition, you can quickly add a few KPIs and have your website ready.
Visual KPI Designer allows you to control many configurations. This guide will help you create the basic configurations and explain the available features.
Contextual help
In the Visual KPI Designer, each worksheet includes headers that indicate the data to be entered in a cell. Click in any header cell to see a tooltip explaining the data in that column.

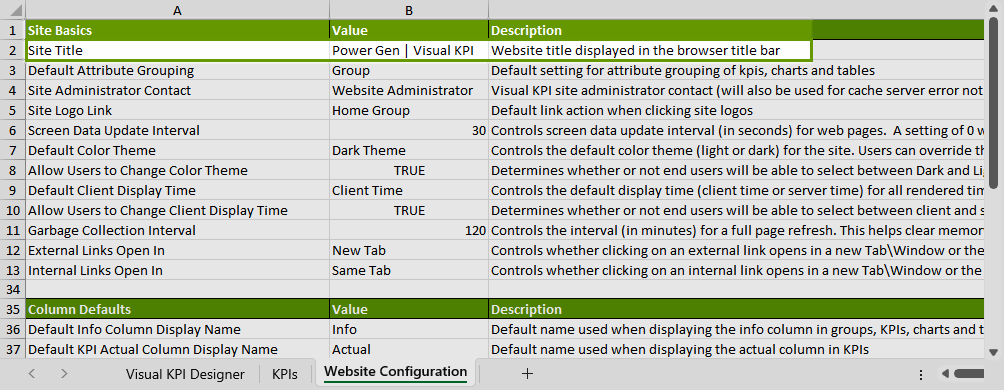
In addition, some configuration worksheets have Description columns to add context to the current parameter. It tells you exactly what that item means and helps you know what kind of value to enter. For example, in the Website Configuration worksheet, the description for Site Title tells you that whatever you enter here will appear in the website's title bar.

Website worksheet
On the Visual KPI Designer toolbar, you have access to site settings. To configure you site, select site settings (![]() ) → Features & Config → Website which will open the Website Configuration worksheet. You can choose to keep any of the default settings, but here we will present some basic configurations you may want to set up immediately:
) → Features & Config → Website which will open the Website Configuration worksheet. You can choose to keep any of the default settings, but here we will present some basic configurations you may want to set up immediately:
Site title
The default Value is Transpara Visual KPI. You can change this to reflect your website's name, to be displayed in the title bar.
- In the Site Title row of the worksheet, click the Value column.
- Enter your site's title.
- Click the Save icon (
 ) in the Visual KPI Designer toolbar.
Admin information
Choose the contact for your Visual KPI site. The contact will appear in some System Configuration pages on your site and will also be used for cache server error notifications.
- Select the Value cell in the Site Administrator Contact row.
- Use the pulldown menu to select the appropriate contact.

Cache warning
To receive notifications of issues relating to cache errors, follow the instructions below:
- In the Cache Alert Notification Protocol field, select a notification method using the pull-down menu. When set to None, notifications will not be sent.
- In the Cache Alert Reminder Interval field, enter a value in minutes indicating the frequency of sending cache alert reminders. When the value is 0, the Reminders will not be sent.
- In the Cache Warning Interval field, enter a value in minutes. When the value is 0, the Cache Warning is disabled.

Site logo
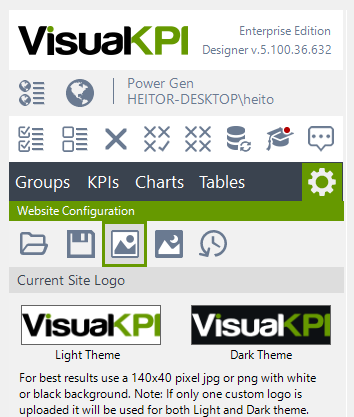
The default logo is from Transpara Visual KPI, but you can easily change it following the steps bellow:
- On the Visual KPI Designer toolbar, click the Upload Logo icon (
 ) in the Web Site Configuration toolbar.
 - Browse and select an image file (JPG or PNG) of your logo. Click Open.
- Click the Save icon (
 ) in the Website configuration toolbar.

You can add different logos for light and dark modes.
If the logo file doesn't match the required size (140 x 40 pixels), the image will be forced into the specified size, causing some distortion in the image.
What's next?
Now that you know how to do a basic setup, learn how to further customize your Visual KPI pages on the Authoring guide.