Advanced
Advanced settings are settings that most Designers won't need to change. However, if necessary, you can use them to change specific aspects of Visual KPI.
Interfaces
Designers can use the Visual KPI Designer to modify Interfaces by navigating to settings, Advanced, and Interfaces.
An Administrator must set up the interface before it appears in Visual KPI Designer. For more information on how to set up an interface, go to the Admin guide for Interfaces Configuration.
The URL field is crucial for specifying the server URL used to invoke the Interface methods. The Admin informs the URL for an interface, and it will appear in this worksheet with default information in the necessary fields.
Managing the Batch Size and Enable fields allows designers to optimize data retrieval and control interface functionality. The Batch Size attribute determines how many values are retrieved in a single call, which can be adjusted to improve performance, especially for slow-running interfaces. The Enable attribute controls whether the interface is active, allowing designers to turn data retrieval on or off as needed. This level of control ensures that only necessary data is retrieved and that disabled interfaces do not interfere with system operations.
Attributes
Custom attributes are additional categories of information associated with your data, allowing you to customize the definition of each object type. Clicking Settings, Advanced, and Attributes, you can configure up to 20 custom attributes sitewide using Visual KPI Designer. An attribute definition includes an Attribute Name, Description, and Default Values. The Default Values are presented as a list in a pull-down menu within your KPI data definitions, allowing you to select one of the default members.

To add an attribute, first enter its Attribute Name and a Description, if necessary. Then, in the Default Values column, enter the default members of the list, separated by semicolons. Default Values are displayed on Visual KPI Designer in a list form in the attribute's column in the KPI Data worksheets. The Reference Count is automatically updated each time you open the Attributes, indicating the number of selection queries referencing the attribute.
When naming your attributes, avoid repeating the names since it might confuse users.
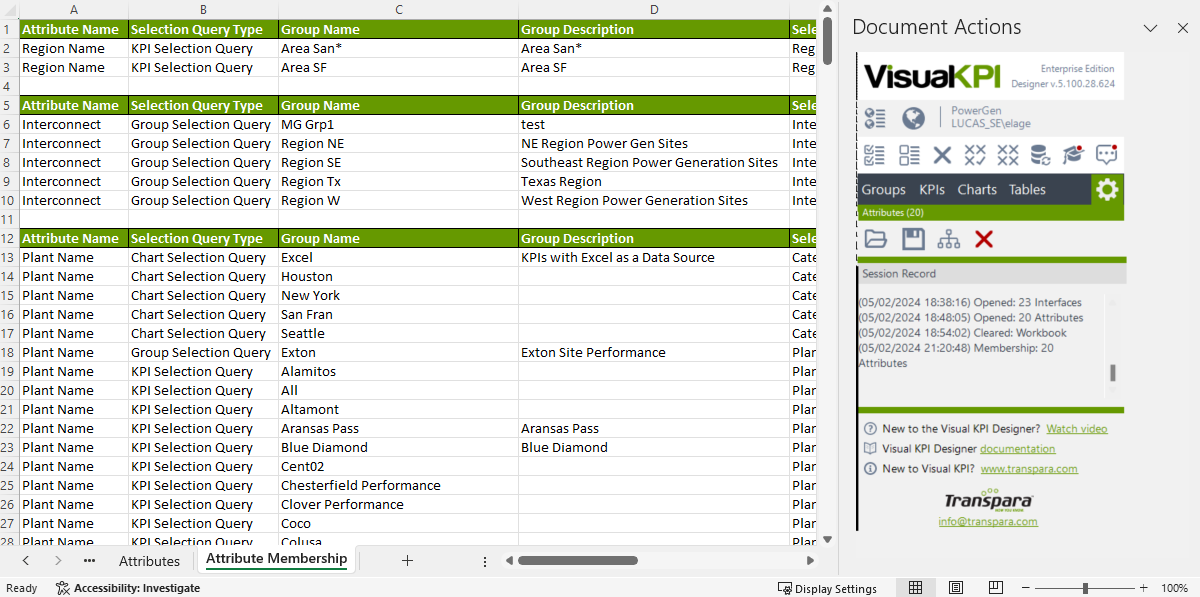
Click the Membership of Selected Attributes icon (![]() ) in the Attributes configuration toolbar to open a new worksheet that shows each attribute and all associated KPIs.
) in the Attributes configuration toolbar to open a new worksheet that shows each attribute and all associated KPIs.

Language
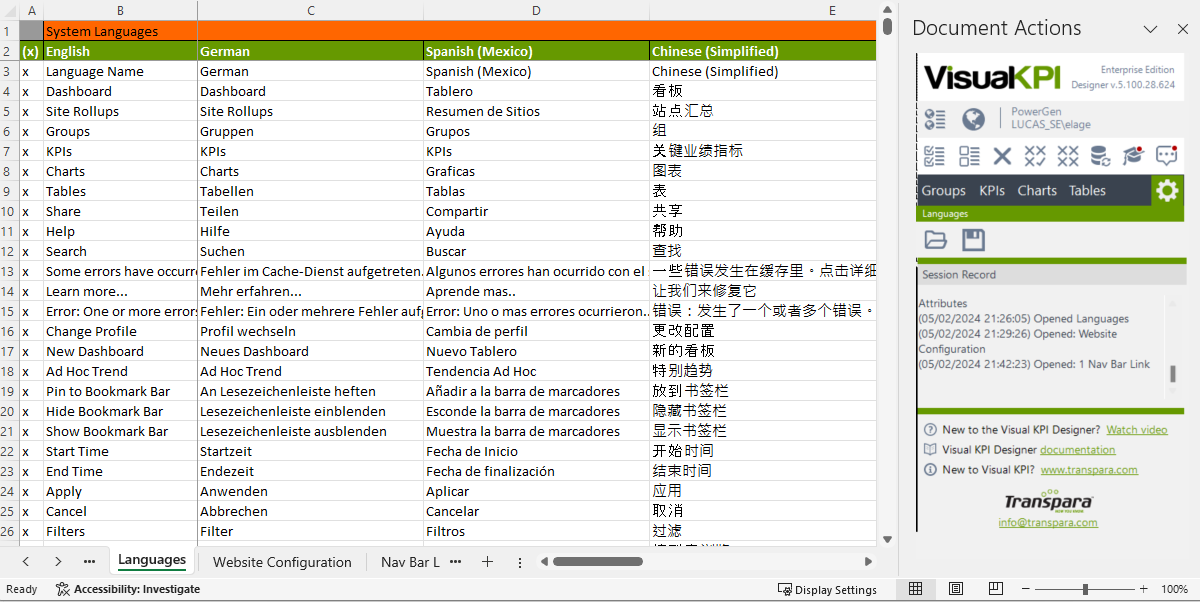
Currently, Visual KPI has five language options: English, German, Spanish, Arabic, and Simplified Chinese. You can use this worksheet to translate the User Interface into your chosen language. Use the Site Settings icon (![]() ) to open Advanced and then Languages.
) to open Advanced and then Languages.

It will open a list of every user interface text you'll find on your Visual KPI site, which you can translate and edit. Once you've added a language in Visual KPI Designer, the new language will appear in Visual KPI Server Manager. You can select the language you want to display in your Visual KPI sites.
However, in some cases, you'll see variables [X] in Visual KPI strings. You don't want to translate the variable because it's a placeholder for text that's returned.
We would really appreciate it if you could share your translated strings with us. We may incorporate them into a future release of Visual KPI.
KPI Nav Bar links
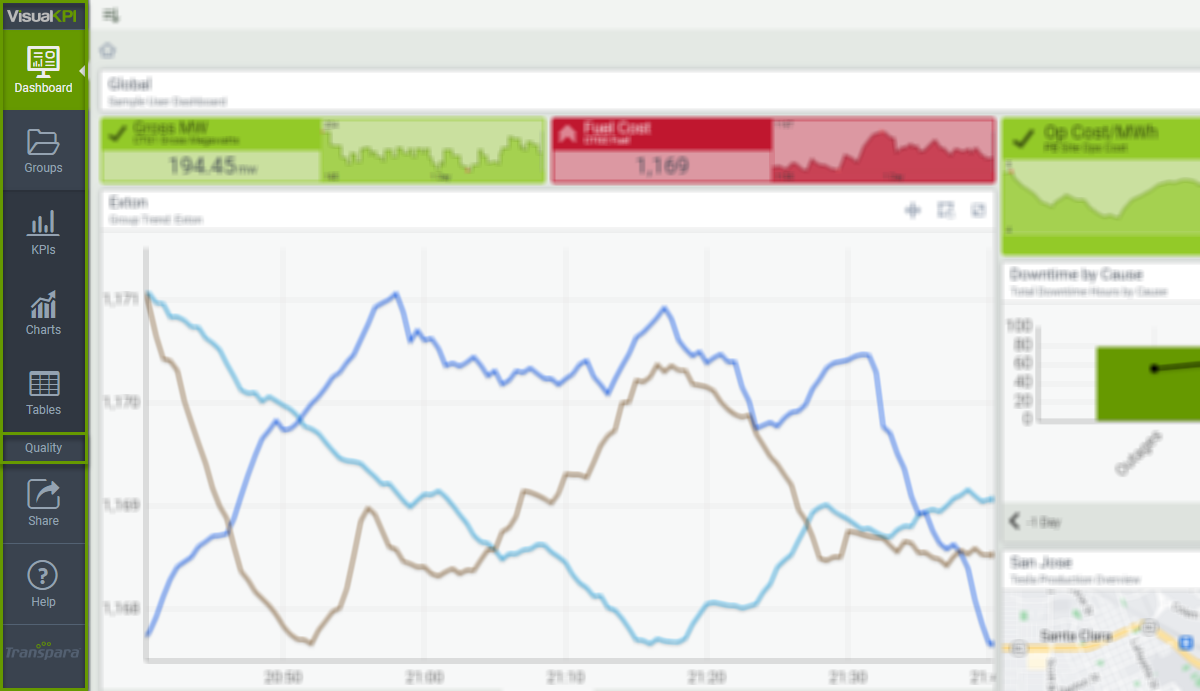
There are many places you can add links in Visual KPI. You can link to almost anything, whether it is another object in Visual KPI, a Dashboard, or an external link. You can even add links to the Visual KPI Nav Bar, called Nav Bar Links.

Use the Site Settings icon (![]() ), access Advanced, then Nav Bar Links. Add the Name and a Description (optional), copy the URL, and use the pull-down menu to Show TRUE. You can change this attribute to FALSE if you don't want the link to display later.
), access Advanced, then Nav Bar Links. Add the Name and a Description (optional), copy the URL, and use the pull-down menu to Show TRUE. You can change this attribute to FALSE if you don't want the link to display later.

These links will appear in the Nav Bar, sitewide, and can be viewed by every profile with access to the Visual KPI site. You should keep the Name of Nav Bar links to 10 characters or less, or your text may get truncated. Additionally, don't add too many Nav Bar links, or your users will have to scroll vertically to see all of the Nav Bar. You can also add links within objects (such as KPIs), in the Bookmark Bar, or as a Custom Dashboard widget.
Site Rollups
Designers can use Visual KPI Designer to modify site rollups by going to the Site Settings icon (![]() ), access Advanced, and Site Rollup section. The Site Rollup name, Description and URL are the attributes used to identify each Rollup.
), access Advanced, and Site Rollup section. The Site Rollup name, Description and URL are the attributes used to identify each Rollup.
The visibility setting, the Show attribute, enables designers to control whether a rollup is displayed to users. Designers can set this attribute to TRUE or FALSE. By carefully managing these attributes, designers can create a streamlined and user-friendly experience, showing only relevant rollups to users while keeping the underlying configuration secure and organized.
Comment Codes
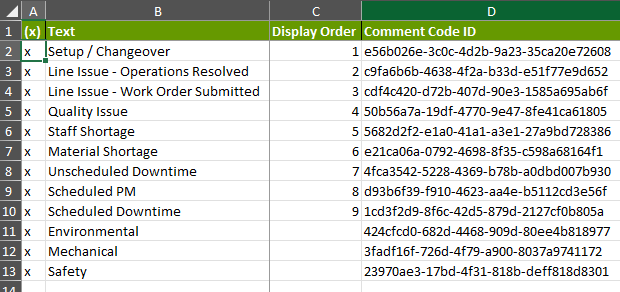
The designer can set up Comment Codes to improve organization and optimize comments. Acess the Comment Codes configurations by going to the Site Settings icon (![]() ), access Advanced, and Comment Codes section. With Comment Codes, users can quickly add a pre-selected type of comment, such as "Maintenance" or "Downtime". The designer should add Comment Codes that make the most sense for their operations and help organize users' comments.
), access Advanced, and Comment Codes section. With Comment Codes, users can quickly add a pre-selected type of comment, such as "Maintenance" or "Downtime". The designer should add Comment Codes that make the most sense for their operations and help organize users' comments.

The options added to the Comment Code section will appear for the End User to select from. The user can choose one of the options and add more information if needed.